November 5, 2019 | Tags: DIY, litter box, love, tips
I am one of those people who has no kids and spoils her cat. My boy, O’Malley, has an automatic food dispenser, a drinking fountain, and even a cat cave that was hand crafted in Lithuania. Prior to this project, he enjoyed two kitty litter boxes – one in the guest room and the other in the guest bath. That arrangement was good for him, but not very welcoming to my guests!

Garage Kitty Litter Inspiration
For years, I tried to talk my parents into building a contraption where they could put their cat’s litter box in the garage. I imagined it would allow for easy cleaning without lugging heavy kitty litter containers into the house. I finally took my own advice and decided to free the inside of my home from unpleasant litter trails that made it hard to enjoy those rooms. O’Malley was going to get his own “kitty litter room” in the garage.

The Kitty Litter Cabinet
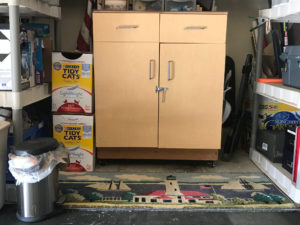
After searching the web for ideas and pondering construction options for a bit, I decided a minimal footprint in my garage with some functionality would be ideal. I stopped one Saturday at the local Habitat for Humanity ReStore and found a cabinet that was a great little find.
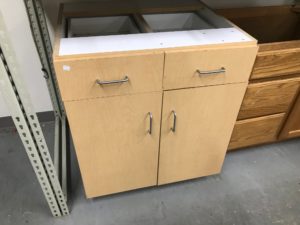
There was no top and it was a bit dirty, but it had excellent potential. The doors did not close easily, but it had high-quality European hinges so I knew making the necessary alignment adjustments would be easy. Couldn’t beat the price at $25!
After getting it all cleaned up, I decided to reinforce the bottom and add casters so it would be easy to move about. I wanted to be able to easily sweep all around it after the project was complete.
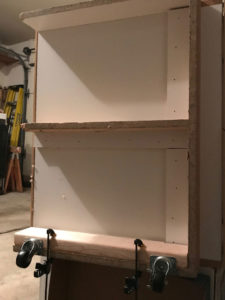
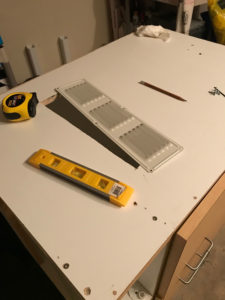
I bought 4 swivel casters from Lowes. Two regular casters and two with brakes, the latter going on the front so it would be easy to lock/unlock once in position. I added vents to each side to help with keeping the air fresh.
Pet Door Installation
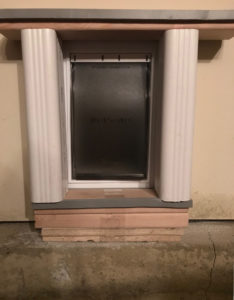
I found the perfect access door to use on the wall between my living room and garage with the PetSafe Wall Entry Pet Door (new version in medium). It was now time for me to take a deep breath and prepare to cut through drywall for my first time ever! I dug out my stud finder to ensure I had the right spot between studs and away from electrical wires.
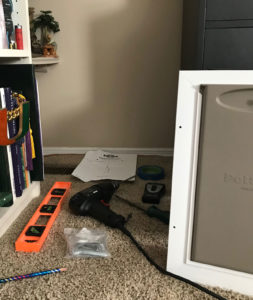
Installing the door was really a breeze. The easy-to-use templates provided with the door are excellent. I highly recommend this product and have been very pleased with the look and performance.
The garage side needed some ingenuity since my condo is on a slab and there was about a 4” gap between the wall and the cabinet. O’Malley is an indoor cat and doesn’t need to be exploring my garage on his own! I found two precut plastic downspout pieces at Lowes and filled those with the insulation I took out of the wall and leftover 2×4 pieces from reinforcing the base for the casters.
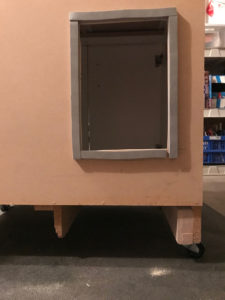
Once I had the door installed, I took some measurements to determine the best place on the back of the cabinet to cut the access hole. I put weather stripping around the edges of the hole so there would be a bit of an extra insulating seal.
Finishing Touches to the Kitty Litter Room
With construction done, it came time for the finishing touches! I found a great kitty litter mat from Gorilla Grip that traps litter from the paws and is easy to clean. It had a great design that allowed for easy cutting to fit the cabinet without shedding fibers.
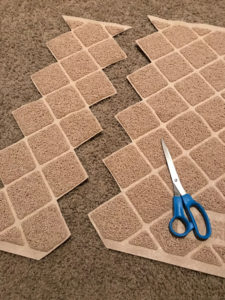
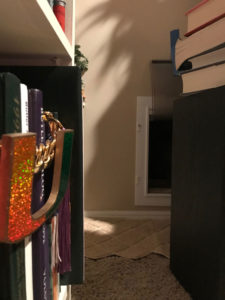
I used the extra piece on the living room side of the pet door so we could trap as much kitty litter from his paws as possible. (NOTE: The flap of the pet door is taped up for the first few uses. Getting the pet used to going in and out before they have to start pushing the flap open for themselves is key.)
To make the cabinet somewhat functional in my garage, I cut a piece of brown particle board to fit the top and screwed that into place. It serves as a little workstation since all my tools are stored nearby. I also added a latch on the doors so O’Malley couldn’t push them open.
That is not a flat panel TV inside the kitty litter cabinet! It is a radiant heat panel designed for chicken coops from Cozy Products to make it a warm space during the cold Ohio winters. I sure hope O’Malley appreciates all I do for him!
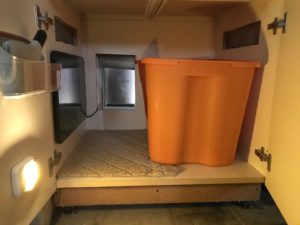
I mounted a battery operated, motion-activated LED night light to give us some light. It does come in handy for me when it comes to cleaning the kitty litter.
To make cleaning easier, I attached a 3M Command Medium Caddy to the door that holds a OXO Good Grips Little Dustpan and Brush Set for quick cleanup. I treated myself to an iPrimio XL Cat Sifter which makes scooping the litter a breeze!
The Final Step & Conclusion
Recognizing this was a lot of change, I used one of his old litter boxes for a few days as he made the transition. My plan was to replace his standard litter boxes with a big, deep tub to help keep the kitty litter where it should be.
The final step was to make the cutout in the side of the storage tub giving him easy access. I was sure to let him rub his chin and make his mark. He took to it immediately. Little did he know that this was the final touch on a very fun project that turned out to be a winner for both cat, mom, and guests!
About the Author
Ashley Breidenbach has worked for Fetch! Pet Care, Inc. at the Ohio-based Franchise Support Center since 2011 in Franchise Administration and Marketing. She loves to #MakeFetchHappen by supporting Fetch! franchisees as they serve thousands of pets and their families nationwide. Returning home at the end of the day and seeing O’Malley always brings a smile to her face.
NOTE: This post contains Amazon Affiliate links for which Fetch! Pet Care, Inc. may earn a small commission.
Source: Read Full Article


